

How to Replace the Covers on the 2017 North Click Bar
Replacing the Covers on the All-New Click Bar
Replacing the Left Cover
- Take an Allen Key, find the two screws at the end of the bar, and twist the key to release the screws.
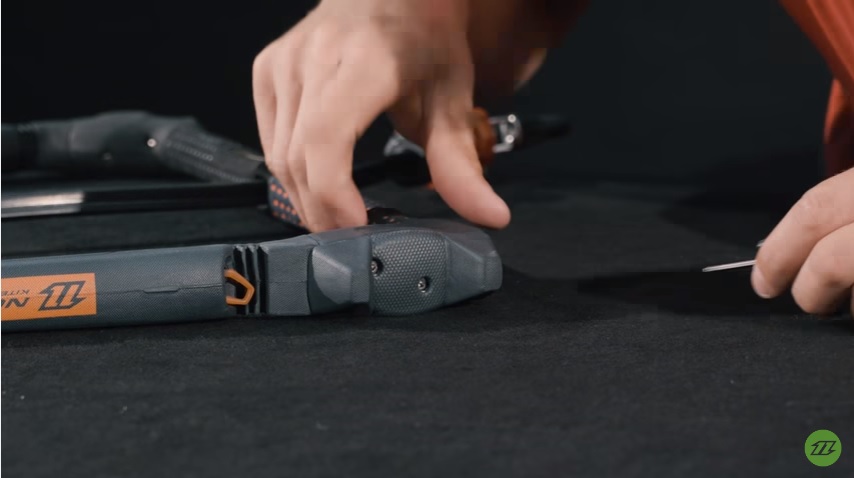
- Pop the cover off slowly.

- Grab your replacement cover.
- Take a look at the inside of the bar and make sure that the leader line is running through the middle two screws that attach your cover.

- Replace your cover, insert the two new screws, and use your Allen Key to tighten them.
Replacing the Right Cover
- Firstly, you want to make sure everything is depowered on the bar. You can do this by pressing in the Trim Unit and pulling your lines. You can double check by viewing the Power Display.

- Take off the Trim Unit mechanism.
- Twist the remaining winder on the bar 90-degrees, exposing the internal screw
- Use your Allen Key to unscrew the exposed screws (Tip: Keep a grip on the winder to make sure the screws don't catch)

- Once you've taken out the screws, pull out the winder and the whole mechanism.
- Undo the push button on the outside of the winder.
- Take the right cover off completely by unscrewing the two screws underneath the push button.

- Take your outside winder and make sure the recess on the right cover fits the groove of the right cover. (Tip: to ensure your winder is in place, place one finger on the inside of the cover, turn it over, and apply pressure from underneath to ensure a tight fit.)
- Replace the two small screws that fit underneath the push button (Tip: don't tighten too tight or you'll damage the plastic on the winder)

- Make sure your top lines are going to the grey leader line and the bottom line is going to the red leader line. Check for any twists.
- Insert the push button and spring into the right cover, connecting the whole unit together. (Tip: If the button doesn't fit easily, make sure the right cover is on the right way. You can tell this by the diagram on the right cover, that needs to be facing upwards.)

- Apply pressure to the outside lines, having the mechanism slide easily into place.

- Give it two or three twists to tighten and reapply the first screws you took out.
- Once the screws are out, give your Click Bar a test to ensure it depowers properly.
26th Aug 2016
Recent Posts
-

Appletree Zapple | Is This the Best Foil Drive Board Ever?
If you've ever had a chance to ride a board that came out of the Appletree factory, you know it's …21st Feb 2025 -

Omen SuperMarine | Flux DNA, Bigger Design, and a Mid-Length Board That Rips
There's an ice shelf along the beach on Lake Michigan, which makes it dangerous and difficult to g …19th Feb 2025 -

All Hype? Or Fully Locked & Loaded? Ride Engine HyperLock hot take review with Jake
Shop Latest Ride Engine Releases. Jake here from MACkite, I recently got my hands on the new Ride …18th Feb 2025